A Stitch is Worth a Thousand Words, Part V: Completion and Reflection
Tying It All Up
And so we have arrived at the end, or rather the beginning, of this reproduction gown’s existence. The last bits of this project all have to do with creating ties, so yes, we are quite literally “tying it all up.”
Creating Bodice Ties
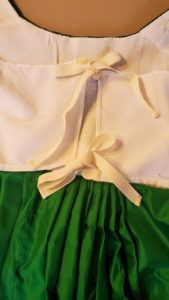
In my previous post, I created the silk bodice front that covered the extra lining that extended across the bodice. While the covering is complete, I need to construct ties that attach to the extended lining. This will keep the bodice together.
To create ties, I cut four 12 inch strips of cotton tape.
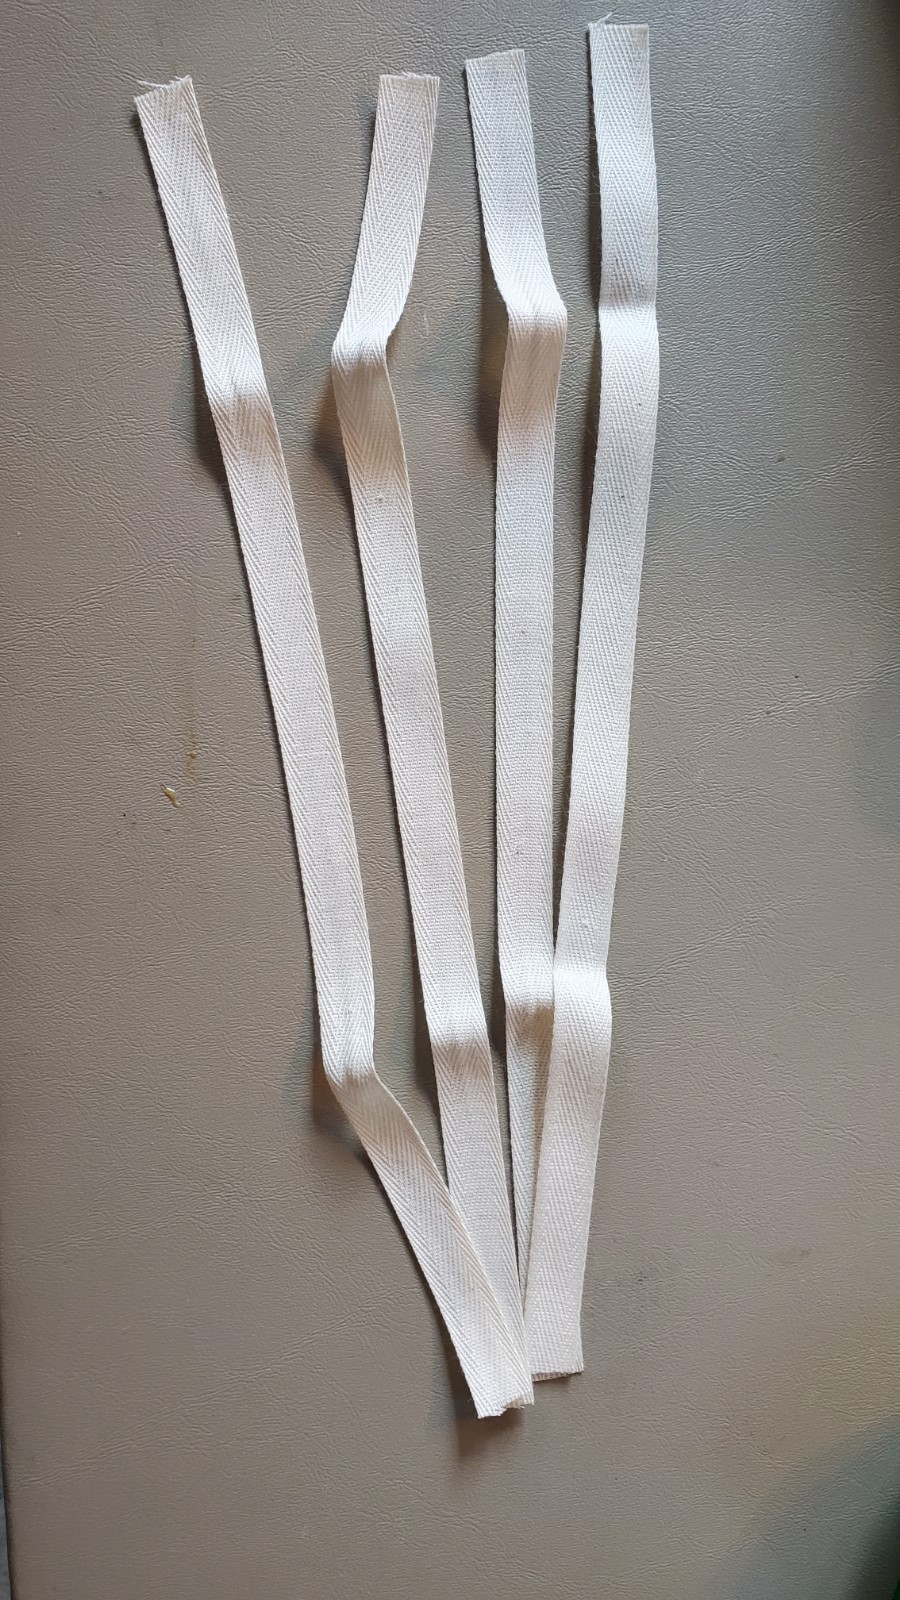
Like the cotton tape ties I constructed before, I first had to tack stitch the ends to prevent fraying. Once complete, I placed each tie at the four corners of lining and stitched them down.
With the four ties sewn to the bodice lining, I could close the two pieces with a simple bow.
Creating the Front Skirt Ties
With the bib apron front complete, I had to create the ties to the “apron.” Because these ties would be visible, I couldn’t simply cut cotton tape ties. Instead, I had to create ties using the green silk fabric.
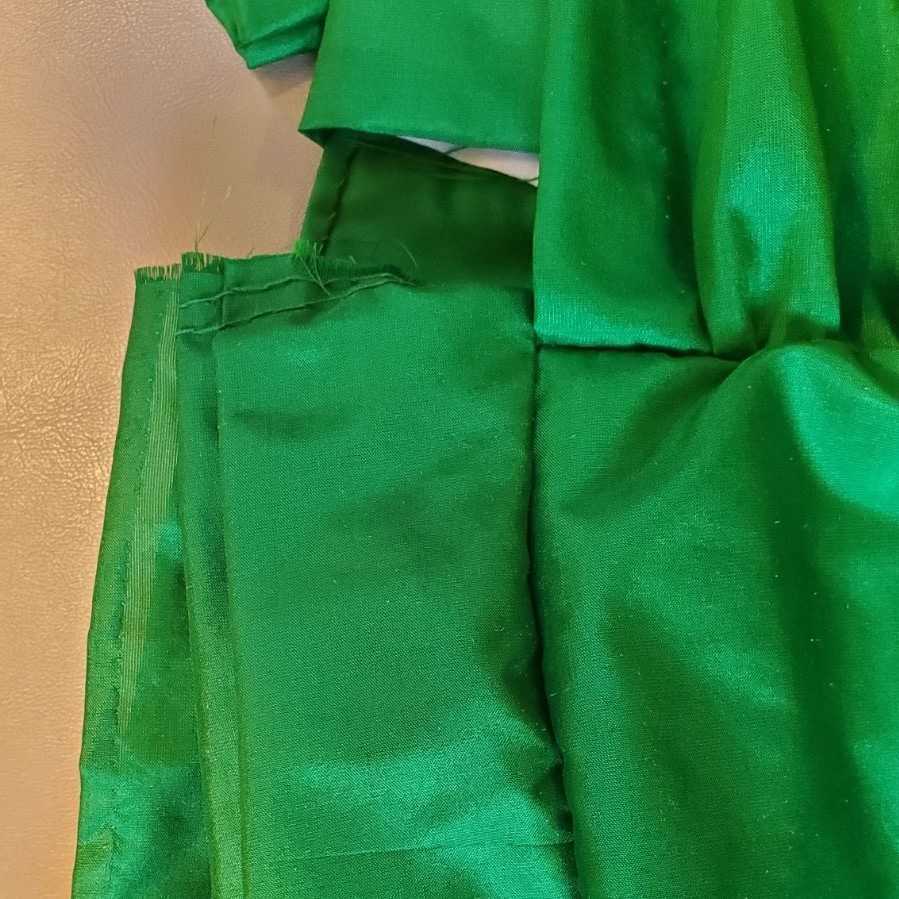
To start, I cut two 34 inch rectangular pieces of fabric. I took one rectangular piece and folded it in half. On one end of the tie, I folded it in half over the front part of the skirt. This small section of fabric is between the bodice and the beginning of the pocket slit. Once it was pinned together, I continued down the length of the tie, folding the fabric in half and folding the raw edges under to create a finished edge. I kept this all together with pins and left the very end of the tie unfinished. I left this unfinished, as I would fold the raw edge in on itself and stitch it together once I got there in my sewing.
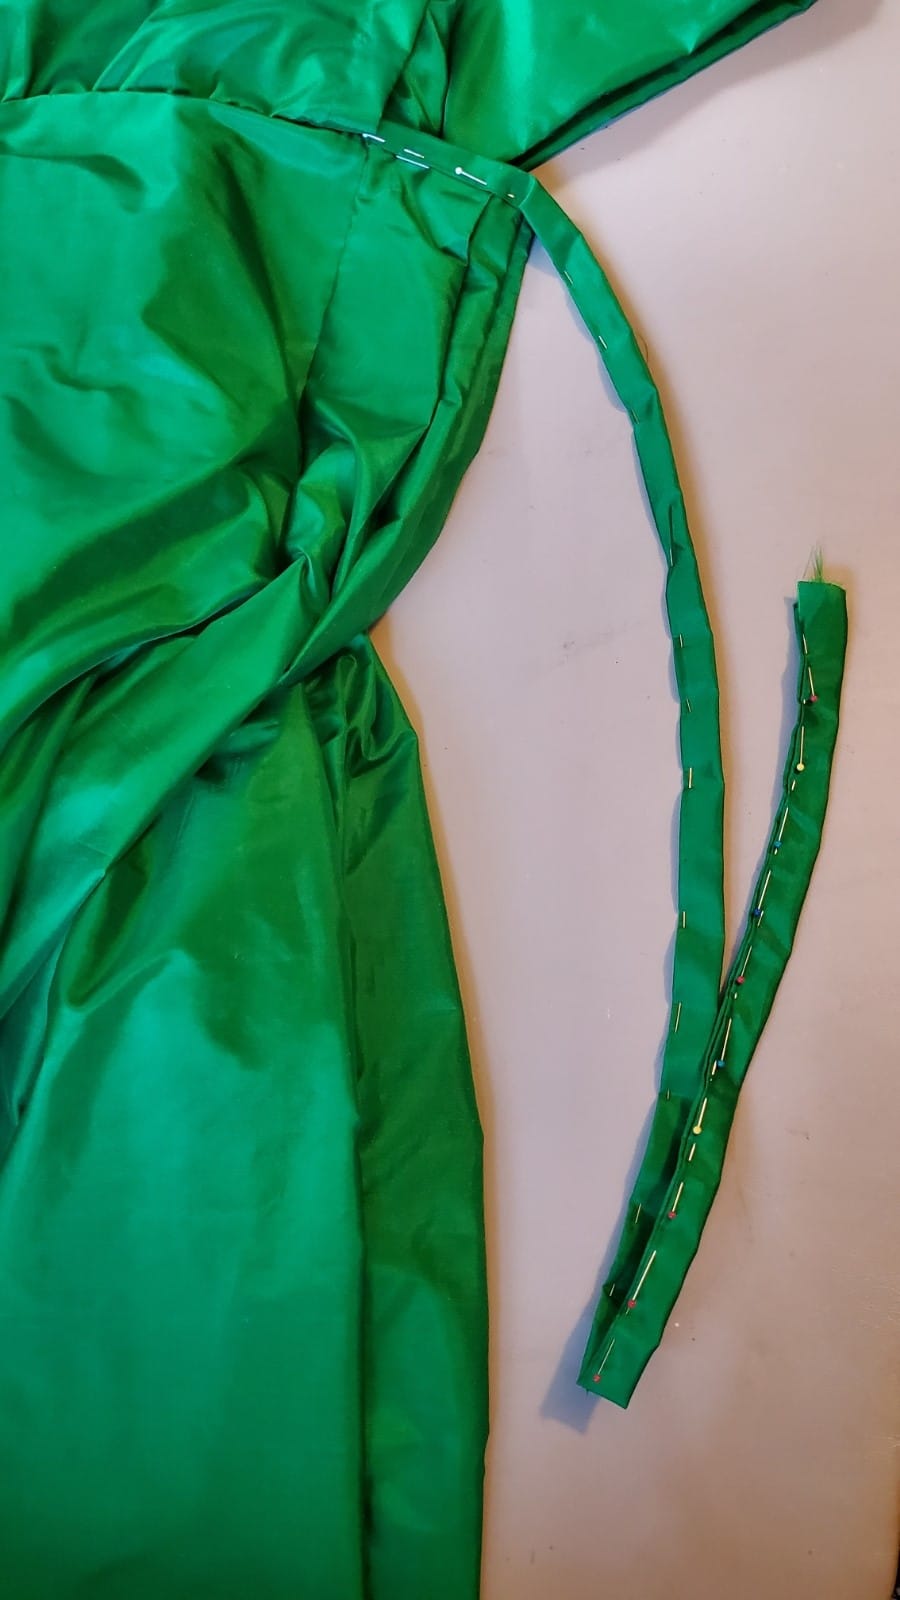
To attach the portion of the tie to the skirt, I used a simple hem stitch on both the outer facing and inner facing sides of the skirt.
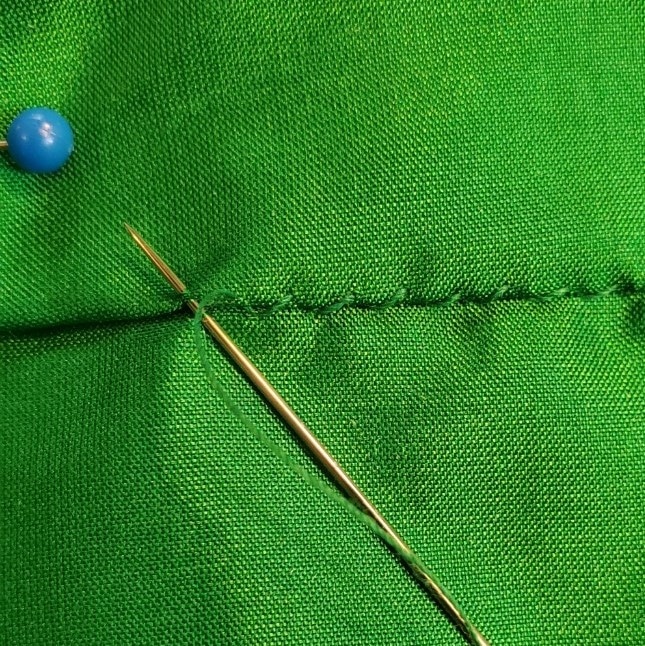
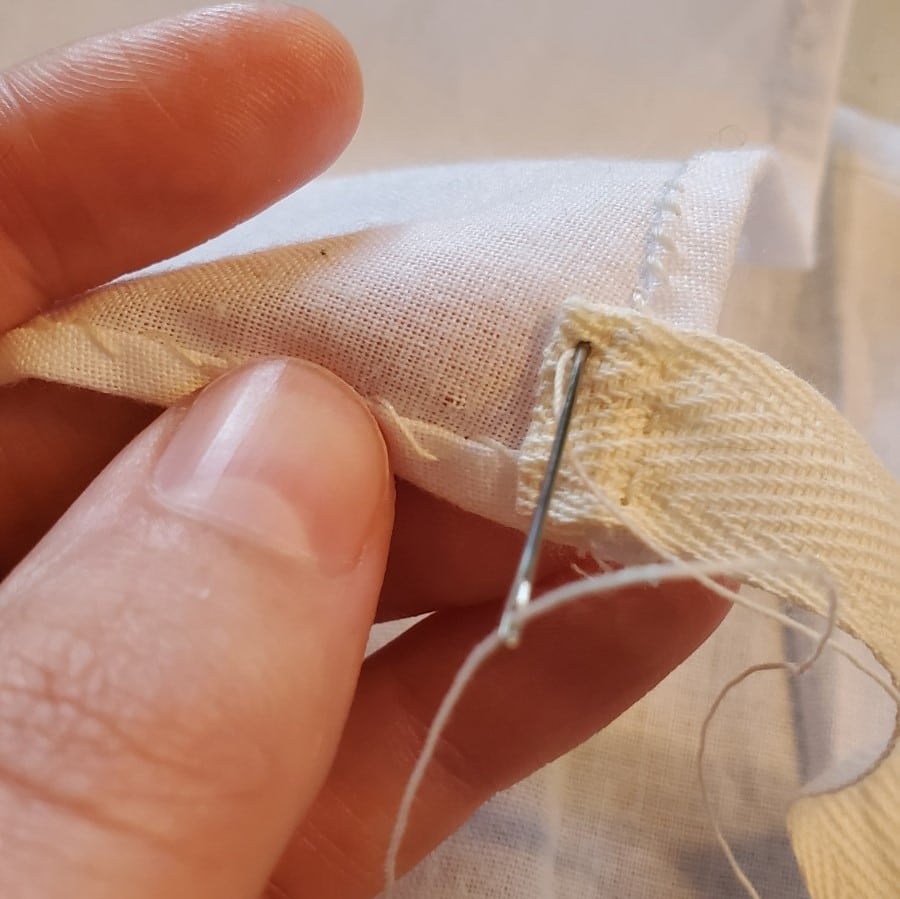
To stitch down the remaining tie, I used a top stitch. A top stitch is a type of stitch to join two pieces of fabric together without having the stitching show on the front side. It is, in essence, a running stitch, but done with extra care so that one does not grab the front end of the fabric with the needle.
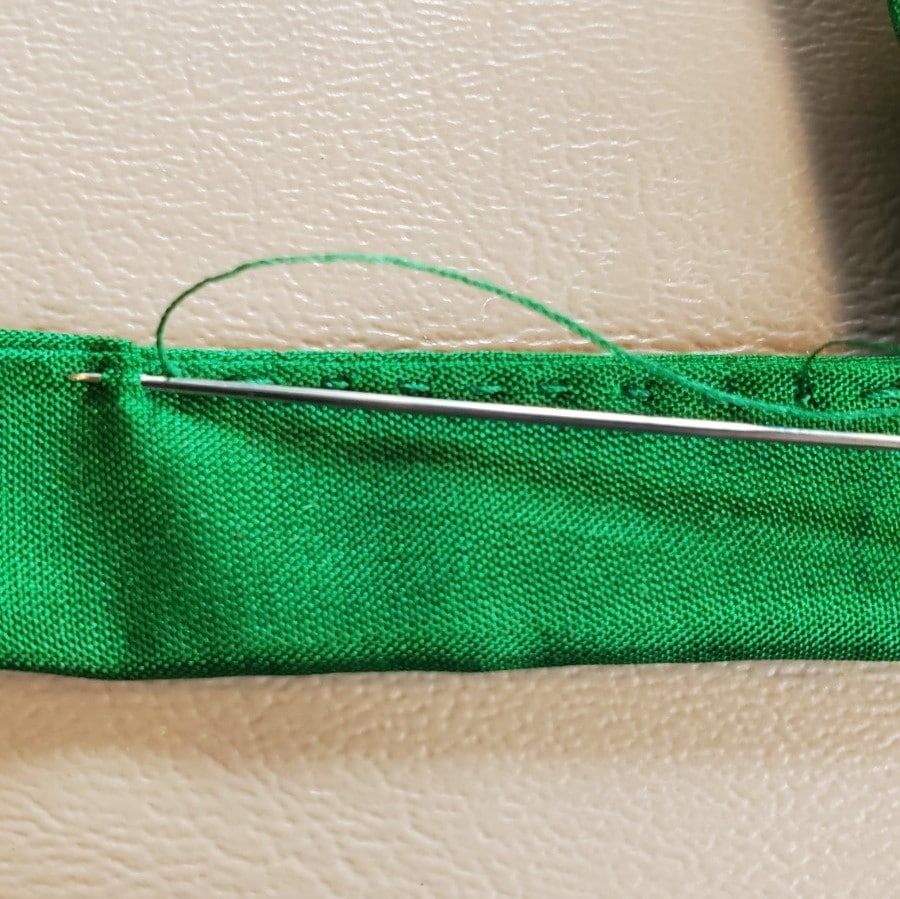
Let’s try to understand this stitch a bit better. Please take a look at the image located right above this sentence. What you are seeing is my stitching on the back side of the tie, as evidenced by the running stitches you see to the right of my needle. If you look right above my needle, you’ll see the two folded ends together. What I am doing is passing my needle through the back side of the tie (the fabric you’re seeing in the picture) and grabbing one or two threads from the folded edge of the front side of the tie. By doing this, I’ve attached to two ends together, but I haven’t passed my needle completely through both fabric pieces. This means that there is no visible stitching on the other side.
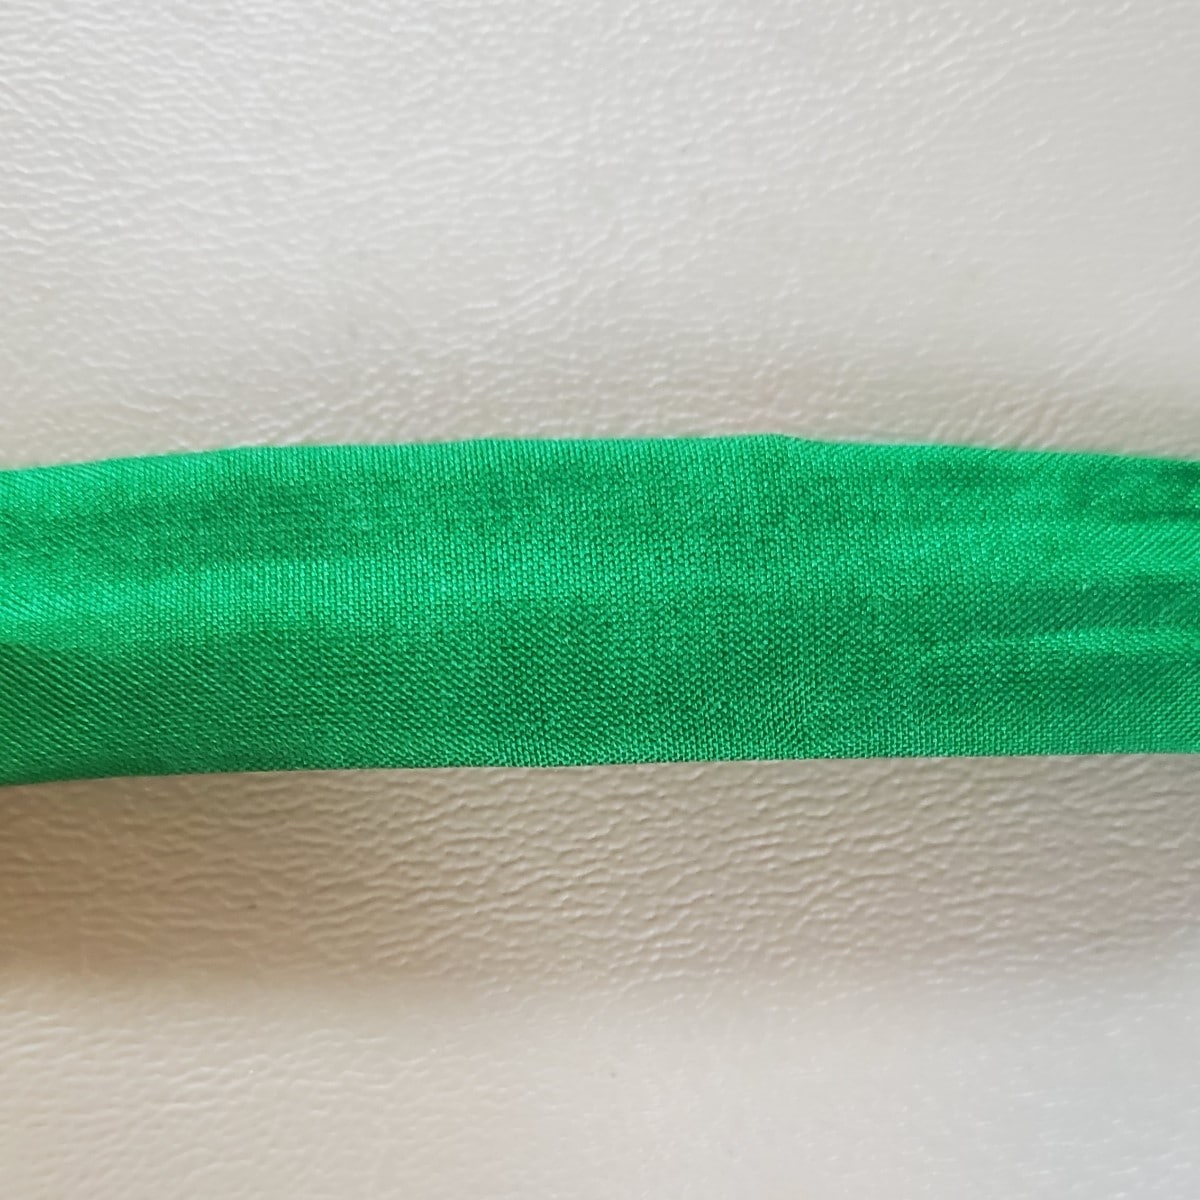
Once one tie was completed, I had to repeat the above steps for the other tie. And with the last top stitch, I officially completed the gown.
A Purpose, A Reflection, and A Sneak Peak
As I passed the needle through the fabric to create a gown from scratch, I regularly thought about the purpose of recreating a gown based on our collections items and what it means to me as a historian who connects the past to our community.
A Purpose
Hand-stitching a historical reproduction gown carries a significant amount of what I see as my purpose in bringing history to the foreground in a tangible and relational sense. A person can read and study endless books and documents, or listen in on many a lecture, but it’s the visible and tangible connection to objects and the historical practice of trades (such as mantua-making) that truly connect history in ways that words cannot.
It could be something as simple as walking the winder stairs at Wheatland and realizing that the narrow turns that make climbing them difficult would be all the more strenuous for a domestic servant carrying a load of laundry to be washed.
Conversely, it could be standing in front of the hat tub in Mr. Buchanan’s bedchamber and imagining what it would be like to bathe during the 19th century.
It could also be seeing (or perhaps wearing) an 1860s gown, experiencing the fashion of the hoop skirt that takes up space. One might initially think how crazy and oppressive it would have been to wear a hoop skirt. However, with more insight through witnessing or wearing an 1860s gown, one might eventually discover that the hoop skirt was something that not only increased better hygiene, but actually put women in the foreground. The fashion put women in such spotlight that it actually triggered a male reaction of believing the hoop skirt made women “too present” by taking up “too much space.”
And finally, it could be the countless hours spent hand-stitching an early 19th century gown to bring collections items to life by wearing it, and as I had mentioned in my first post, learning to understand the time period, culture, and people by “climbing into a person’s skin and walking around in it.”
It’s the visible and tangible relation to objects, both period and reproductions alike, that give us that light-bulb moment and puts things into perspective. And it’s those light-bulb moments that I seek to provide to the community through objects and particularly through historical fashion.
A Reflection
When I stitched this gown, I thought about what it was like to live in a world wherein the majority of the population, save for the wealthier upper class, made their own clothes. Unless a person had the money to buy the latest fashions and employ the likes of tailor or mantua-maker, the only way to acquire clothes was to make them.
As I stitched away, the value and appreciation of clothing that existed in the past became evidently clear. In a world where clothing was not mass produced and arranged in endless racks from which to choose in superstores (like our modern day Target) people treasured their clothing. This included leaving clothing and other textiles in wills, mending and repairing clothing, and re-purposing gowns, such as an 1840s gown that was created by altering a 1770s gown.
Today, if we were to get a hole in a t-shirt, we’d likely throw it away because we know we can buy another garment in the age of mass-produced clothing. The same is true for instances when we grow out of a particular t-shirt and can no longer wear it. And heaven forbid we wear anything outdated! All those “embarrassing” clothing items from the 70s get tucked away in our basement closets, never to see the light of day!
But let me change the scenario. Take yourself out of our mass-produced world of garments and imagine that you made your clothing. Consider the following questions:
- If you made a garment and discovered a hole in it, would you think differently? Would you perhaps choose to mend it, knowing all the time and resources you put into making it?
- If you made a garment and you grew out of it, would you throw it away? Or would you perhaps give it to another person who could wear it?
- If you made a garment that was no longer fashionable, would you get rid of it? Would you archive it into some basement closet where you hide the “embarrassing” fashions of yesteryear? Or would you take that outdated garment and re-purpose it into something trendy that you could wear regularly?
Hopefully, if you could put yourselves into the shoes of someone who had to make his/her own clothes, you might have chosen to salvage those clothes in any way you could. And if you did choose those options, then you successfully put yourself into the mindset of the people of the past.
I did not time how long it took me to hand-stitch my early 19th century gown, but based on my experience with making other historical reproduction gowns and comparing it to the processes I used in this reconstruction, I estimate that it took me 30-40 hours to hand-stitch this gown from start to finish. That’s roughly one work week for a full-time worker— all for one gown.
With that in mind, do the answers to the questions above change at all?
I am constantly aware of what it took just to wear one outfit, and as a result, the attitudes and value of clothing make perfect sense to me. This understanding is hard to reach if I didn’t actively participate in the historical methods of recreating gowns. It’s made me appreciate what we do have in our world today, as well as made me react against a wasteful, mass-produced society in favor of taking care of things like clothing in similar ways to the people in our past. All of that can be learned through the historical recreation of a gown. And perhaps, dear reader, if you’ve read this far, I have been able to pass on some of those lessons to you.
A Sneak Peak
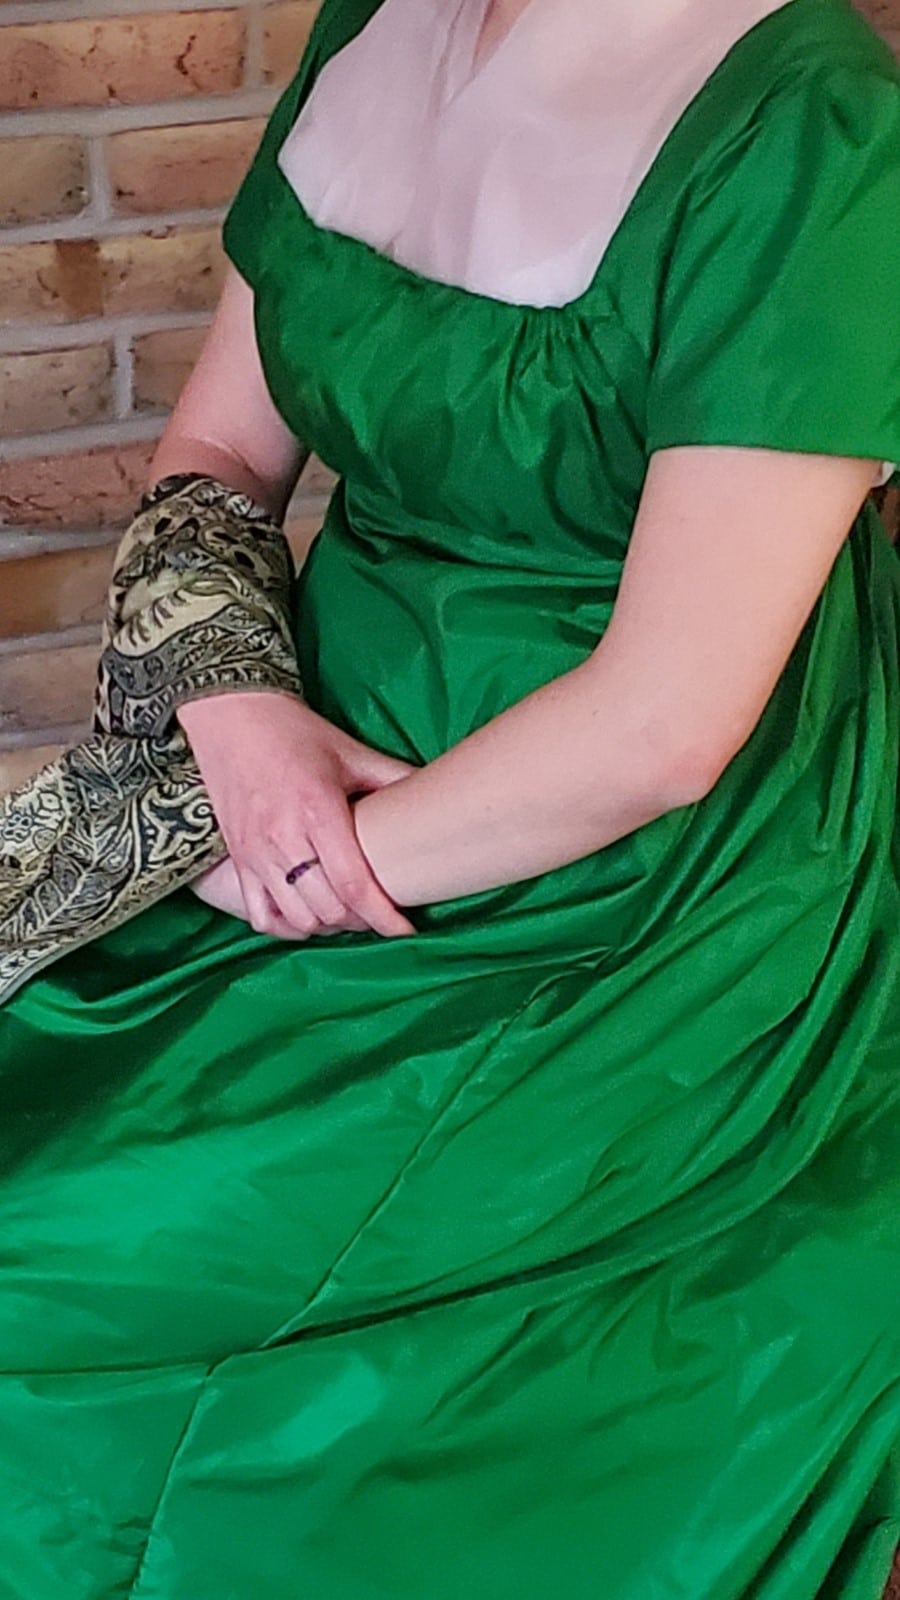
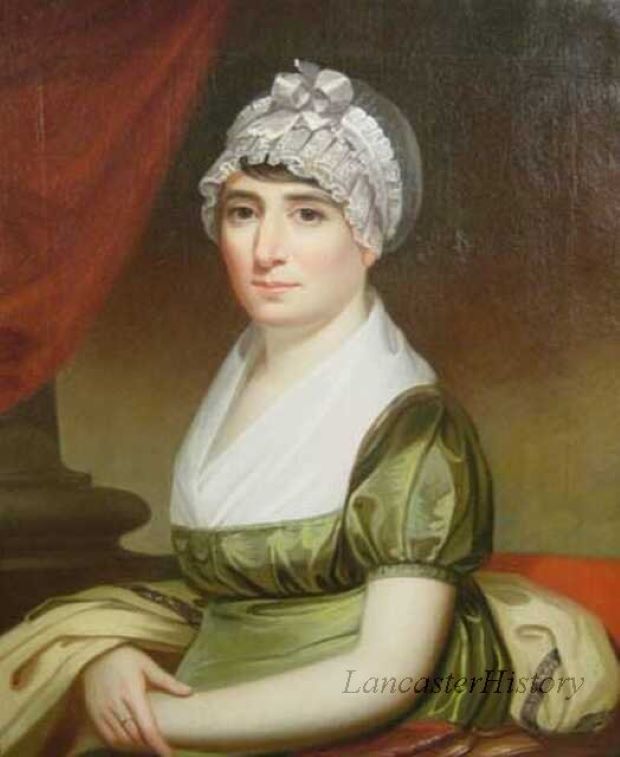
Well, enough life lessons, you say. Now onto the sneak peak. This gown will make its debut at a future Material Culture Conversation. We are planning to pair my reproduction gown with the collections items that inspired this recreation. With past and present side-by-side, we hope to explore how period clothing can tell stories of the people and culture of the early 19th century. To pique your interest, I shall include a detail snippet that compares my gown to the portrait in our collections:
Thank you for coming along with me during my project. If you have any queries regarding historical fashion and gown construction, please feel free to send them through our Contact Form.
From History From The House